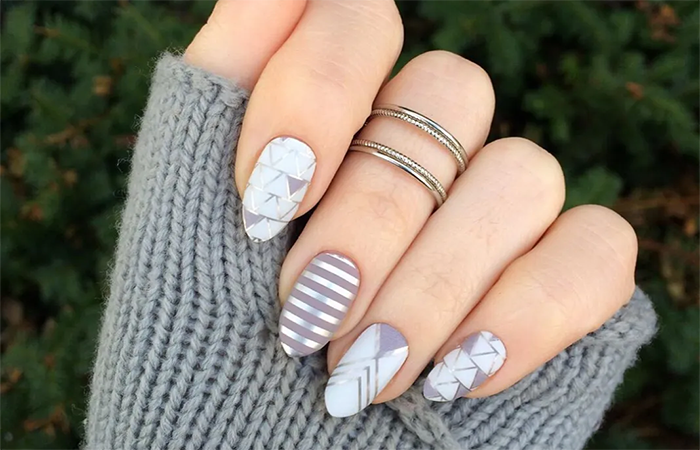
To make nail art stamping, you need a few essential items: a stamping plate with engraved designs, a special nail polish (thicker than classic nail polish), a silicone stamp, and a squeegee or an old bank card. In addition to these items, you also need to know what are the key steps to complete the nail art stamping.
Today, Maryton Nail Supply will explain the key steps to achieving successful nail art stamping to you in this article. Just keep reading!
Here’s how to do it:
- Apply a protective base coat to your clean, dry nails. Leave to dry for a few minutes.
- Choose the design of your choice on the stamping plate. Pour a drop of special varnish on the drawing, then spread it over the entire surface using the squeegee or card. Wipe off excess immediately with a cloth or absorbent paper.
- Lightly press the silicone stamp onto the image ready to transfer. The design should now appear on the stamp.
- Quickly apply the buffer to the nail using a rolling motion to cover the entire surface. Repeat this step on all your nails.
- To finish, apply a transparent top coat to protect and give your manicure a long duration.
You can also add small accessories such as rhinestones or glitter to make your nail art even more sophisticated. In addition, I recommend investing in some professional manicure sets to care for your nails.
Read also: How To Have Perfectly Clean Nails?
Related Posts:
 6 steps for nail polish application that lasts Are you tired of redoing your manicure every 2 days? To save you the trouble, the nail supply expert Maryton offers tips on getting a pretty manicure that lasts several days. Read on! 1. We…
 What equipment do you need to do a successful gel manicure? Gel manicures have become one of the most popular options for flawless and long-lasting nails. To achieve a salon-quality gel manicure in the comfort of your own home, you’ll need…
 All the essentials for a successful semi-permanent manicure Semi-permanent varnish is the solution if you are fed up with your varnish which is flaking or which only lasts a week. Do you want to create your own semi-permanent…